How to Setup an AWS SNS Topic and Subscription
What is Amazon SNS?
===================
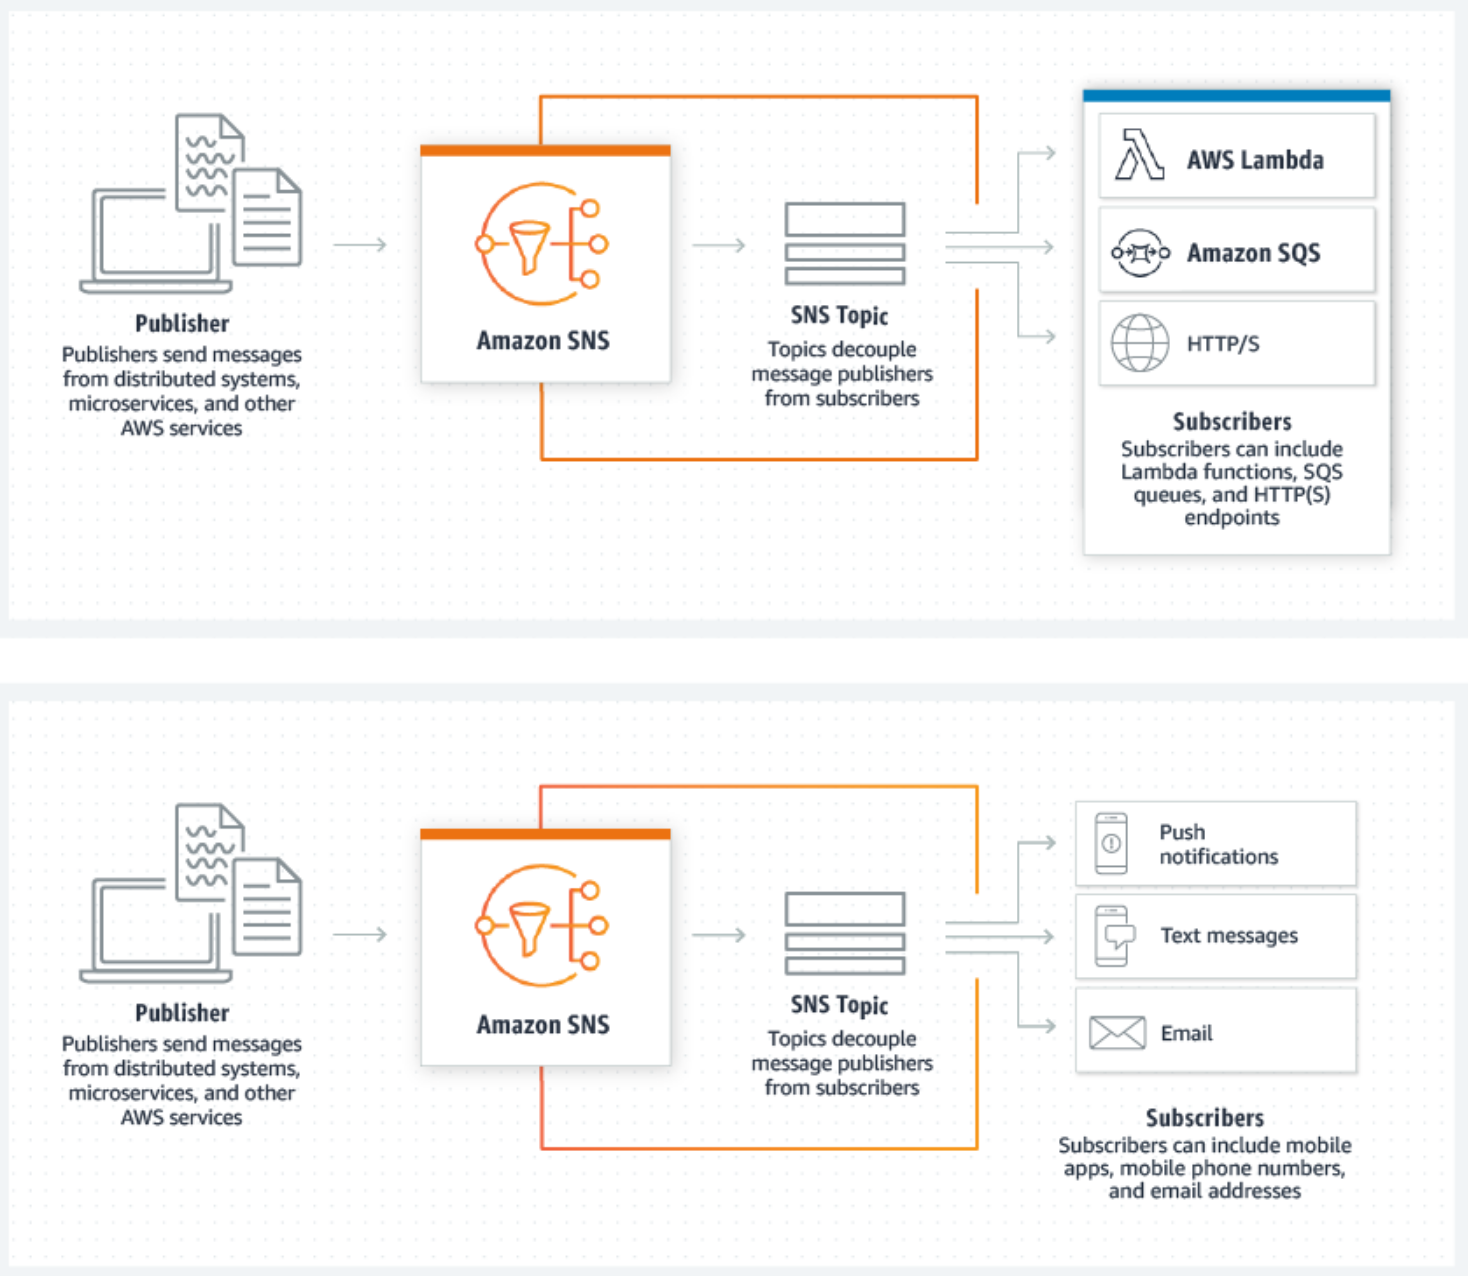
Amazon SNS (Simple Notification Service) is a managed messaging service that decouples publishers from subscribers. It allows an application to send messages downstream to a subscriber based on user defined events. The SNS is composed of two major components - Topics and Subscriptions.
SNS Topics
An SNS Topic is a communication channel used for sending messages or events. The Topic can be subscribed to by services such as Amazon SQS, HTTP/S, email, SMS, and Lambda.
SNS Subscription
An SNS Subscription is the subscriber to your application (publisher), it must be one of the following - Amazon SQS, HTTP/S, email, SMS, and Lambda. The Subscription receives messages after an event happens in your application and is pushed to an SNS Topic.
What you'll learn
Next we will walk through the steps for creating an SNS Topic and creating an SNS Subscription that is sent to your personal email. This is a great way to test that the Topic and Subscription are working correctly together and that you are successfully subscribed to the correct topic.
Create Topic
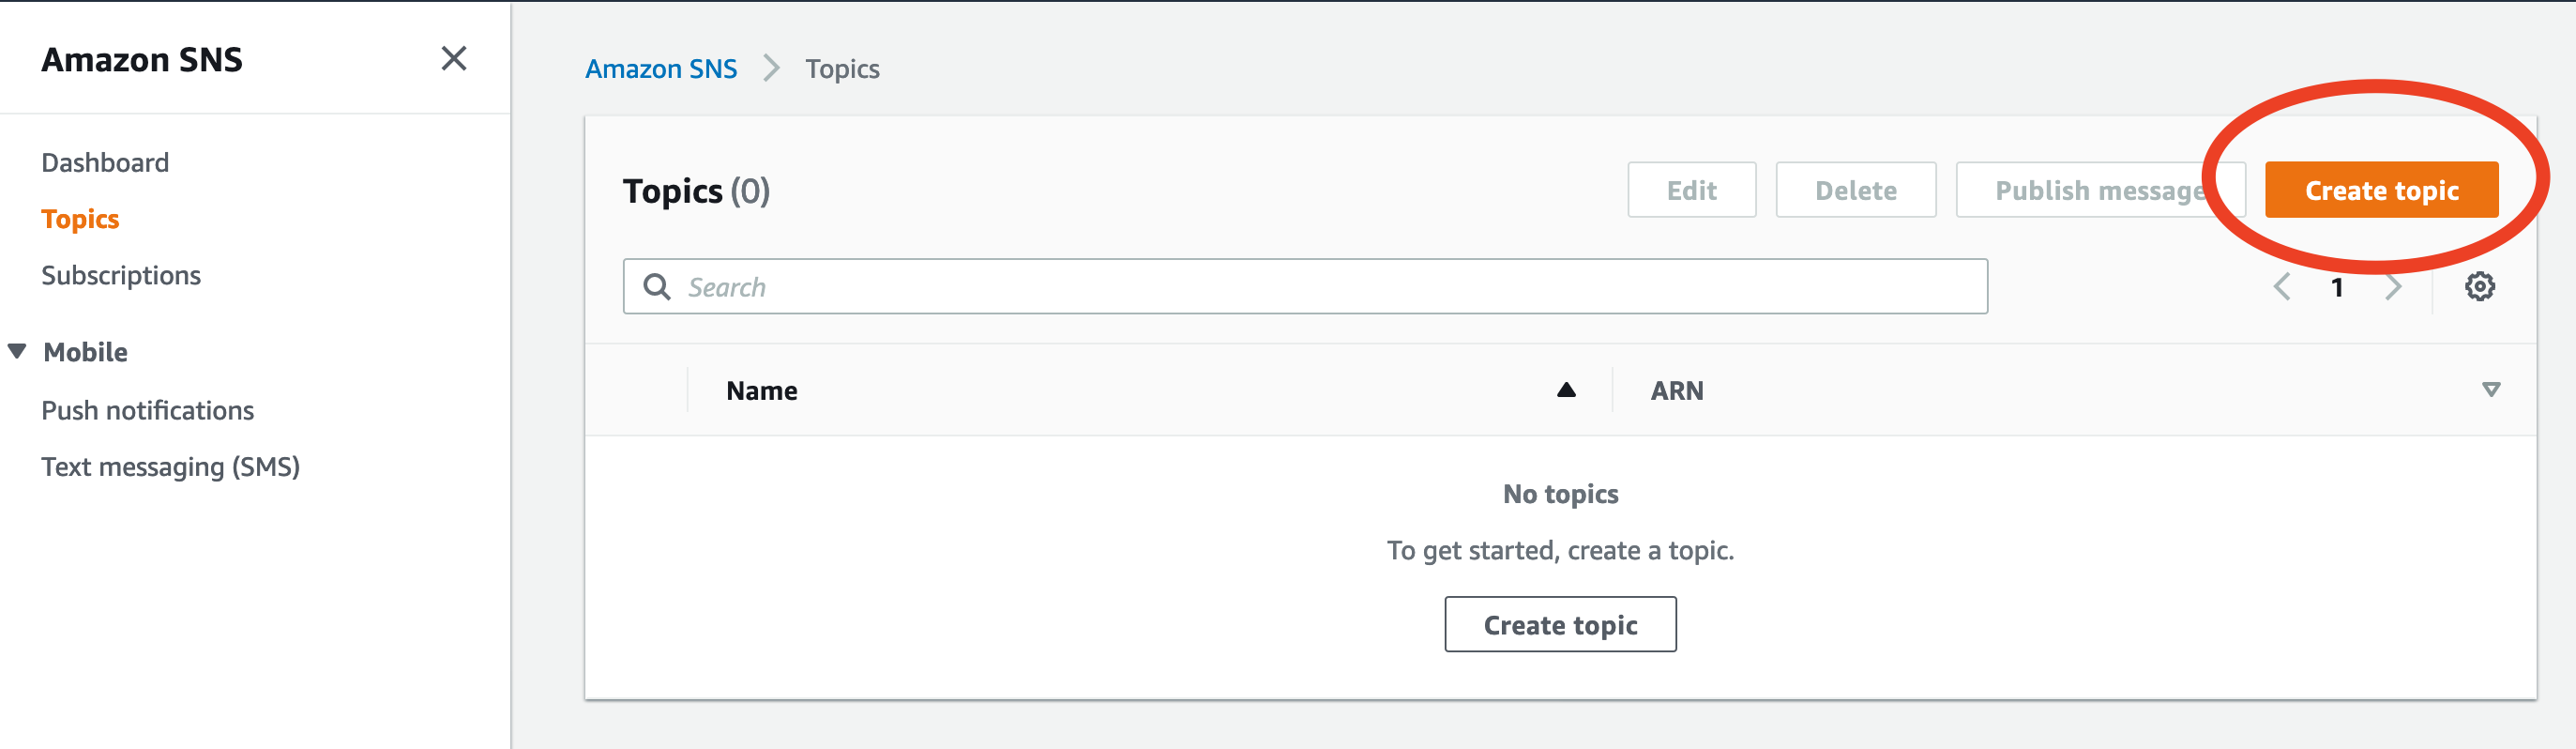
To get started log into your AWS account and navigate to Amazon SNS. Unless you have previously created a Topic, this section will be blank as shown in the image above. Click the Create Topic button and follow the steps below.

Fill out the Topic Name and Display Name. For the Name, follow the hints below the text box, I reccomend either underscores or dashes for spaces to allow for the best readibility. Once you're done, scroll to the bottom of the page and click the orange Create topic button.
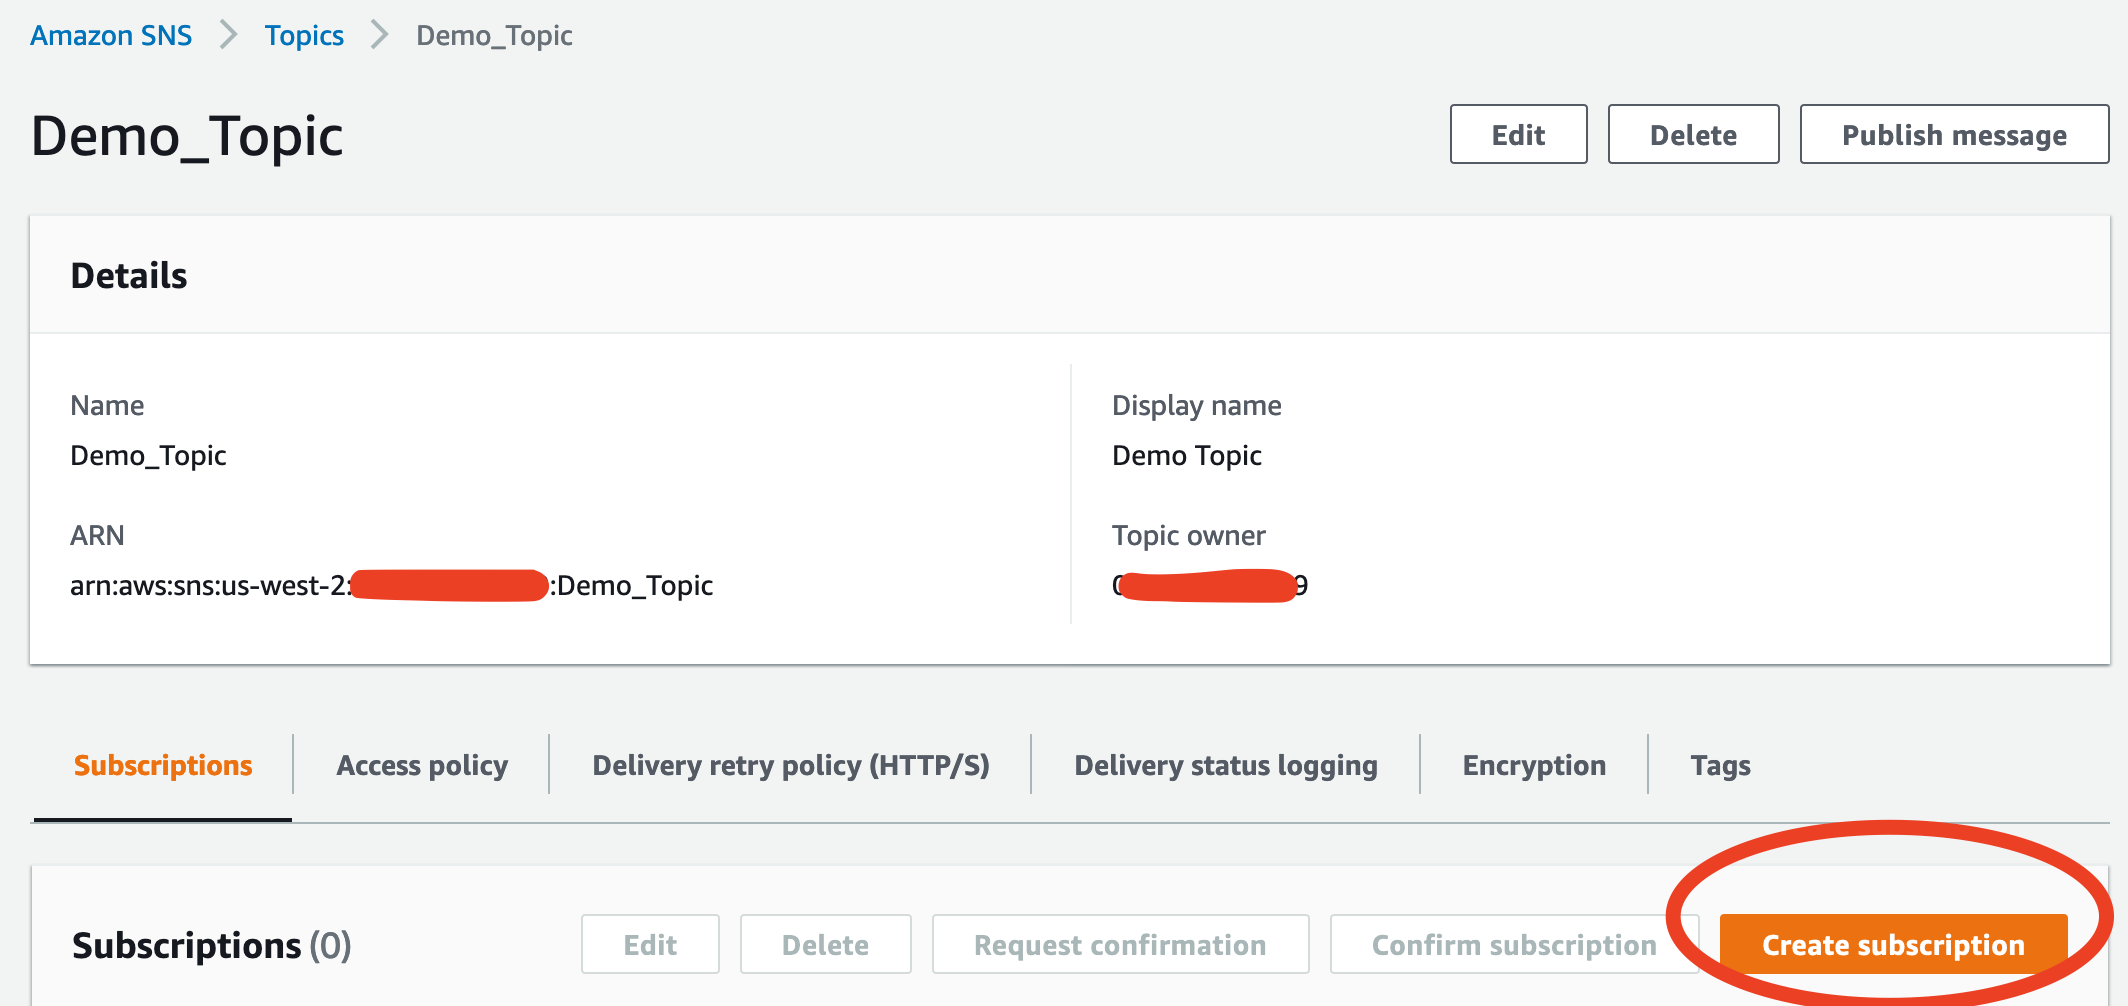
Now you'll be redirected back to the new Topic where you'll be shown the Topic Name, Display Name, ARN (Amazon Resource Name) and the Topic Owner ID. You'll notice that there are no subscriptions yet, so next we will click the Create subscription button to create a subscription.
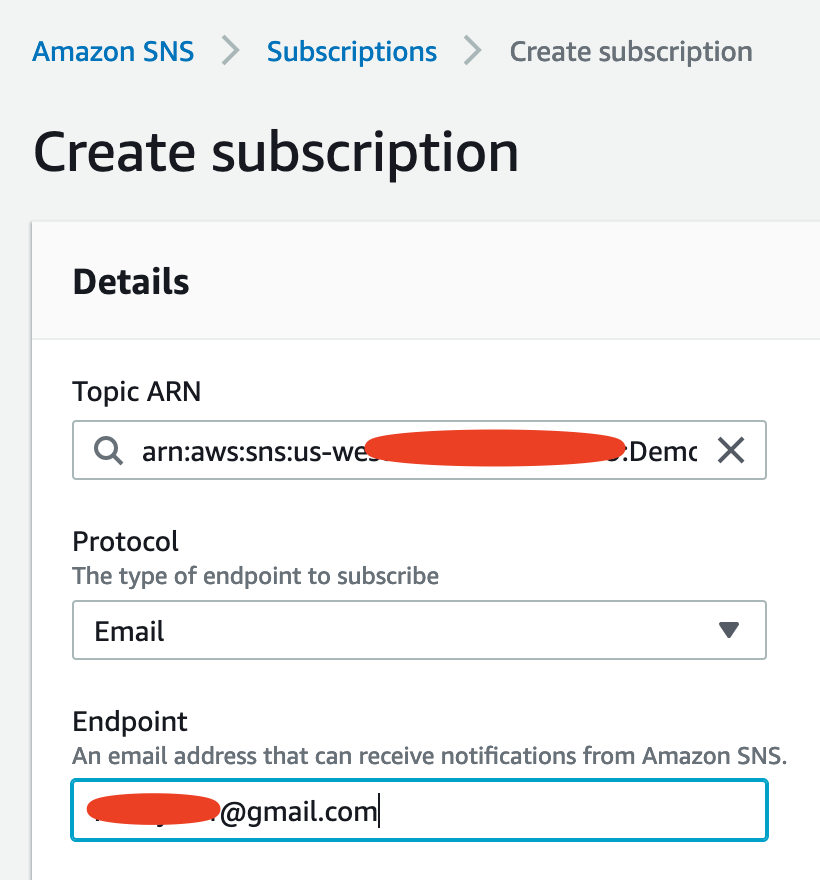

Create a subscription by filling in the Topic ARN, Protocol, and Endpoint. As you only have one Topic ARN this will be auto populated. We are selecting Email as the Protocol and finally enter your email address as the Endpoint. At this point scroll to the bottom of the page and click the Create subscription button.
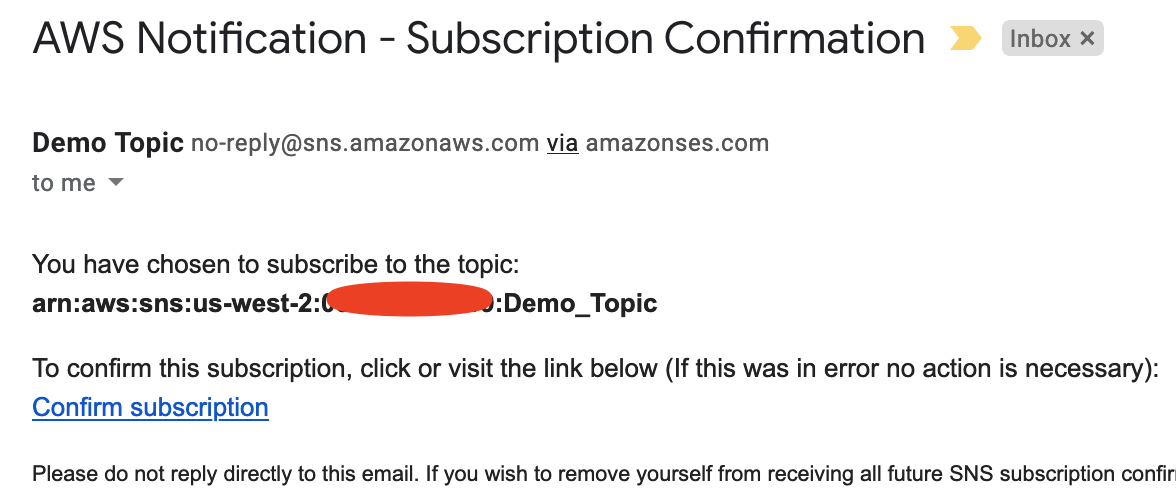
With the subscription created, switch to your email client and you should have an email with the title of "AWS Notification - Subscription Confirmation" or something similar. Open the email and click the Confirm subscription link. This is a critical step, without the confirmation you will not be confirmed and will not receive notifications.
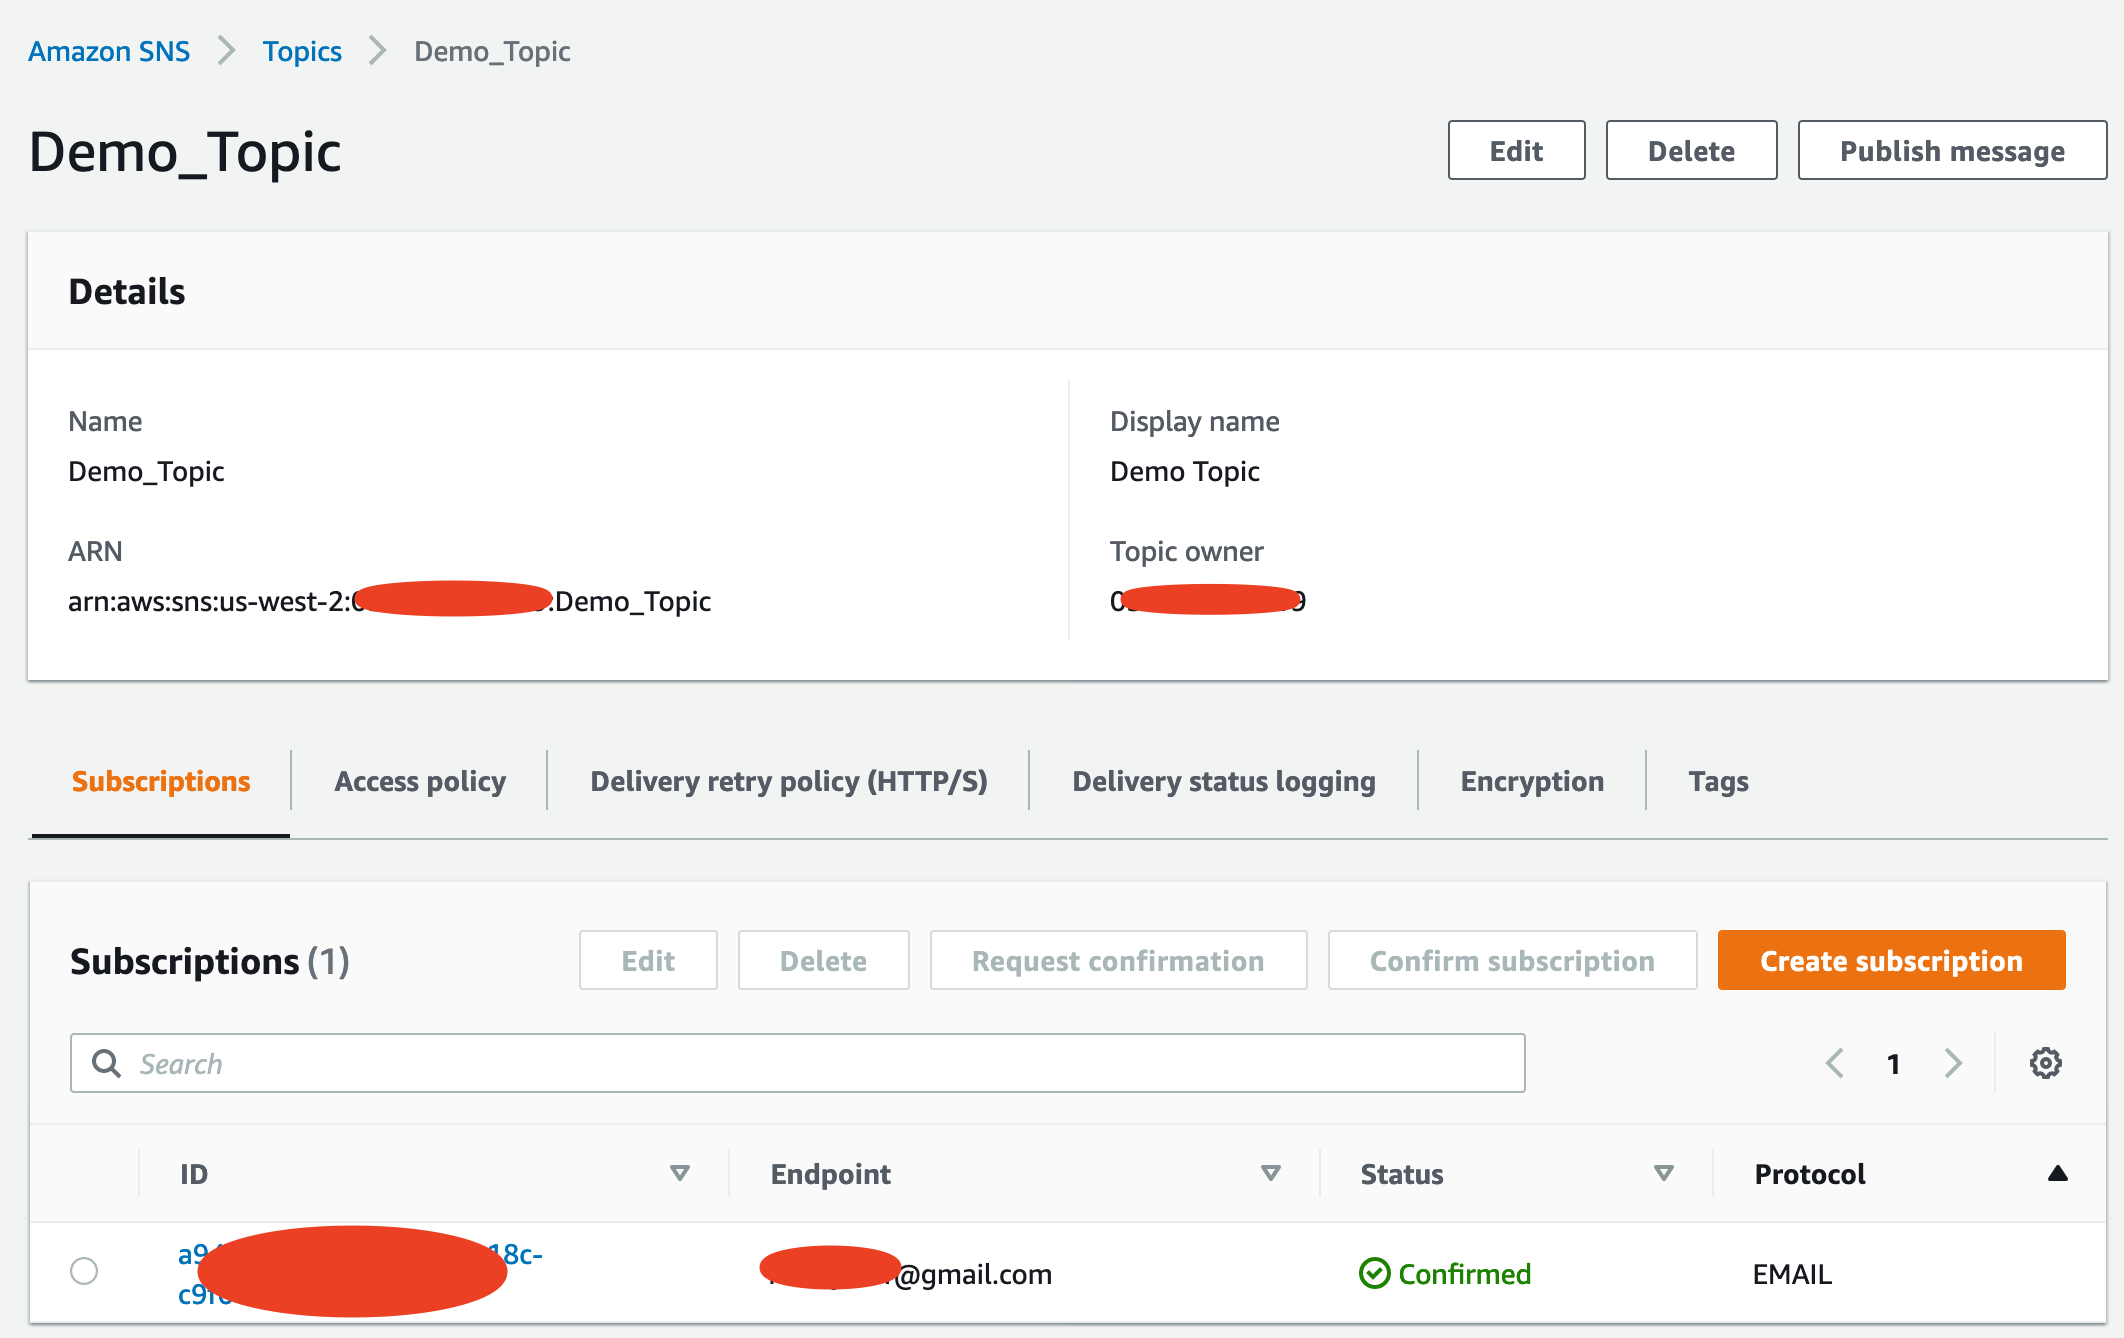
Now head back to the AWS console and refresh the Demo Topic page, you should see the Status for your subsciption set to Confirmed. One final step, click the Publish Message button at the top of this screen to send yourself a test message.


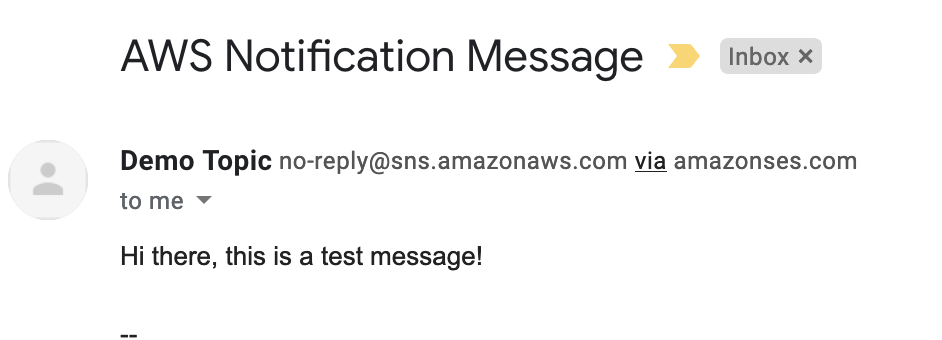
Scroll down to the Message Body section and enter in a test message to yourself and then click the Publish message button. Then head back to your email client to retrieve the message.
And there you have it, a fully functioning AWS Topic and Subscription setup. Very soon I will have another post on how to use AWS SNS Topics in a Python Flask application and how to test them with Pytest.
Thanks for reading!